Husky 31610 Brute Super Foot Retractable Jack Extension – 6500 lb. Load Capacity
This is a quick upgrade but I figured it should be included, too. We simply needed some extra length on our front jack. When we get home from a trip we park our girl up on her dedicated concrete RV pad and she waits there like a good girl until the next trip, but the concrete slopes down quite a bit towards the street. Raising the jack leg until it’s fully extended so it won’t go anymore while sitting on two 3×3 wood posts to make it level just doesn’t feel good. I’m sure the jack is fine to fully extend otherwise it’d have a lower set point. But mainly, at its maximum the trailer’s nose is still about a foot too low, and this girl doesn’t like to kowtow. It also messes up the fridge and prevents it from getting cold a day before a trip. Annnnd, I sometimes like to sneak out and eat my own bowl of popcorn in private while watching a few of my shows without the ‘ol lady beautiful wife taking my stash! =P
So… I set out looking for a way to extend the jack’s reach. I was trying to decide between the Fastway Flip and the Husky Brute. I really like the way the Flip does most of the work, but it just doesn’t support enough weight. Since our Toyhauler has a front garage, I simply chose the one with the most load capacity, which is the Husky Brute Super Foot.
I forgot to take a before shot, but the first order of business (after supporting the frame) was to drill a hole from left to right. There’s already a hole that attaches the post to the foot, but it goes from front to back. Darn. This took three bits stepping up from small to large to get it to the right diameter.

Next was to run the bolt through the hole with the main swivel part. I didn’t need the smaller 2″ collar that comes with the kit, our’s is 2.25″ and it slipped right on. Also, I wanted to be sure to use the lower hole so that I’d have as much of the collar into the extension’s pocket as possible. The upper hole would’ve made it wobbly I think. I am thinking of doubling down though and putting another bolt through the top hole as well.


Next up was to bolt in the actual extension tube itself. The instructions say that you can modify and cut the tube if it’s too long. For us, it’s the right size.


Finally, I installed the foot to the extension tube and it’s all done! I just need to test it while the rig is still well supported to make sure it’ll take the load.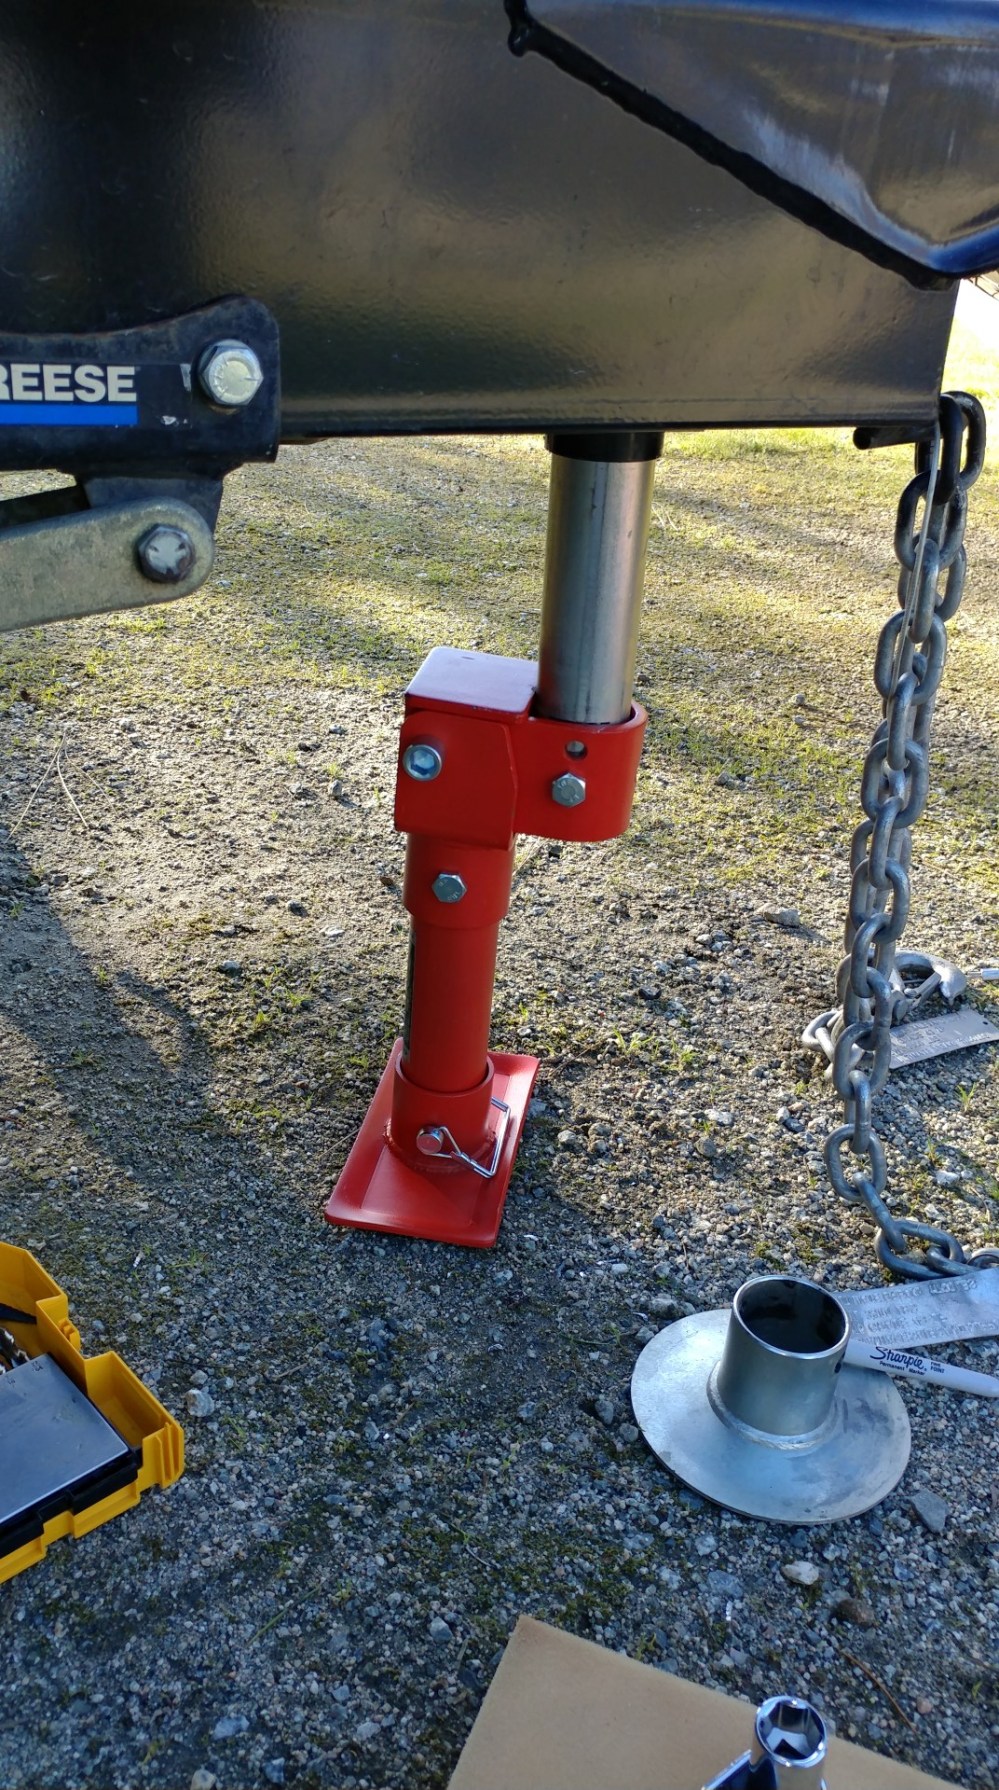
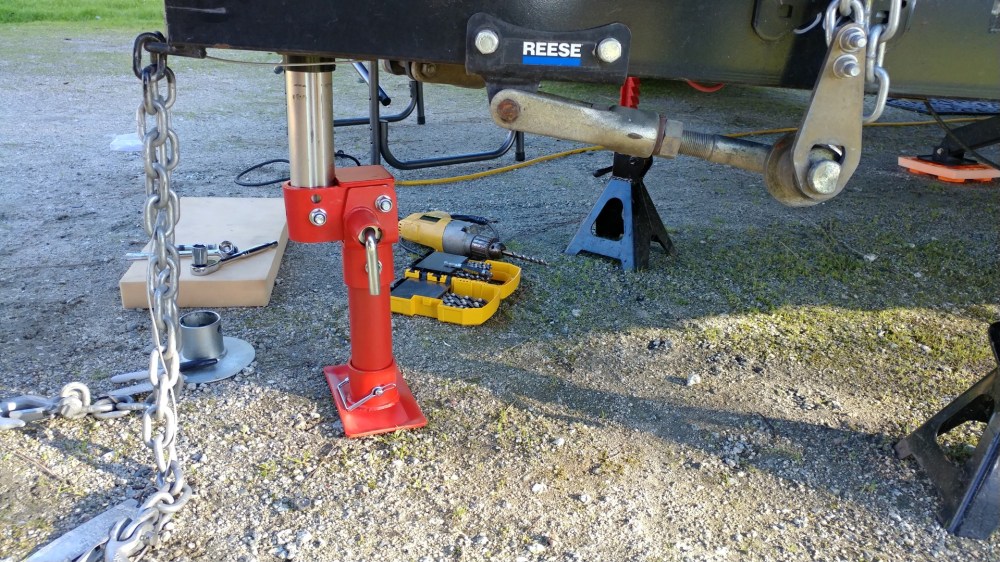
One thing to note, if the extension tube happens to be too long for a certain camping spot, you can leave the whole thing in the upward “traveling” position, remove the foot, and just run the jack all the way to the ground like you normally would’ve provided the post is taking the burden and not just the horizontal extension tube. That’s a very flexable option.
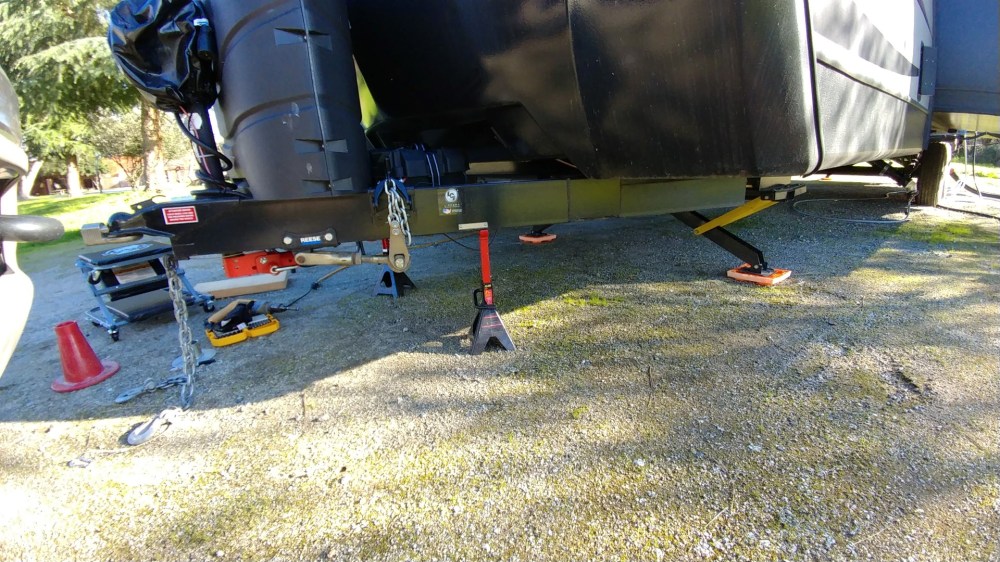
This is a simulated before/after in one shot. In front of the rig is how we used to do it, the old jack foot on top of a riser cone.


A final note… When landing, I found it’s better to kick the foot in either direction (fore or aft) so it “locks up” and won’t toggle when you take it off the ball. There is some play in the extension components which are inherent in the design of the swivel. It’s a lot faster though and safer than stacking wood under the jack, I have confidence in the setup. It can handle surfaces up to 10 degrees of incline which is pretty neat and similar to what we have at home. No more 3×3’s and a fully extended front jack.
The end.
Check out our other upgrades! Have any questions about this project? Please chat below and I’ll try to respond in a reasonable time. Remember, we have full-time careers and this blog is just a hobby. ☺️
Best regards – RVTherapy

One comment