The garage in the 324CG comes with two standard LED light fixtures mounted to the ceiling which provides a decent amount of light, but not enough for “garage use”. Keystone for whatever reason decided not to install a wall switch for those lights, so they must be switched on/off separately at the source. Which is a problem if, for instance, you used the garage for its intended purpose and have a motorcycle parked inside… in the way of getting to those lights!
Instead of wiring in a switch, which I’ll do at some point anyway, I decided instead to add a shop light. The advantages are it’ll be much brighter and I can get one with motion detection. This Winplus 45” LED Utility Light with Motion Sensor from Costco is a great buy, and there’s a bunch of options (dimmer, brightness, the length of time to stay illuminated, day/night modes, etc.) built-in to select how you want it to behave. The features ares a bit overkill for my application since I’m using just the brightness and motion detection settings, but hey…
Because of how the garage is configured (arched ceiling specifically), I decided that a wall mount instead of ceiling mount would be best, and the wall which separates the garage from the living room seemed to be an ideal location. In my testing, the light throw towards the bunks is ideal and the 45″ width of the light is enough to prevent casting shadows when standing anywhere in front of it.
Once again, I used my awesome stud finder to search for a secure place to mount the shop-light hoping to use the stock mounting brackets, and again I was fooled by other things in the wall that looked like a stud to the finder but wasn’t. For instance, this huge bunch of wiring stuffed into this small cavity for the RV’s TV coax looked like a stud.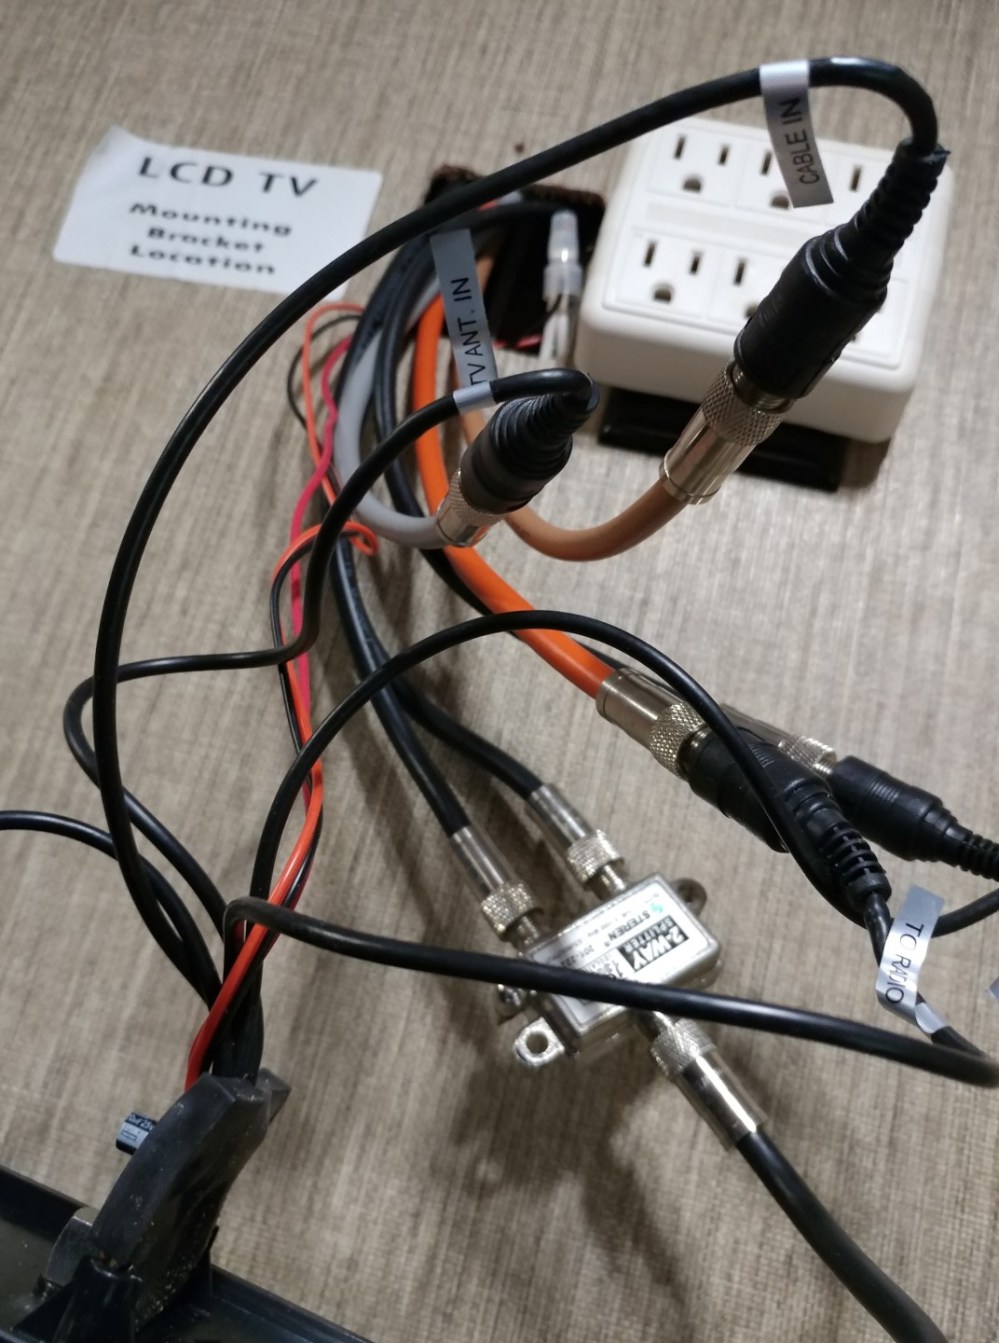
The shop-light mounting needs to be centered on the wall to satisfy my minimal OCD tendencies, and since there’s seemingly no standard to stud width separation in the RV industry I had to mount the shop-light to a backing board. By using a backing board I can place fasteners where the studs are and then mount the light anywhere on that board.
In my scrap pile at home, I found some support lumber from an old bed frame and painted it flat black so it’d hopefully disappear behind the light fixture. A while ago I bought a bunch of fasteners to keep on hand for projects in the RV and they look great, too. Attached to the board already are the included metal brackets for the light fixture.


I thought I pre-drilled the holes large enough, but apparently, it wasn’t because I ended up splitting the wood still. Because RV’s traveling down the road is like a constant earthquake, I wanted to be sure the light and mounting won’t fall down so I patched the cracks in the board by putting glue into them.
Here’s how close the stud was to the mounting bracket, but then the light wouldn’t have been perfectly centered on the wall. The other side was way off. As usual, I used gorilla glue on the fasteners going into the wall studs.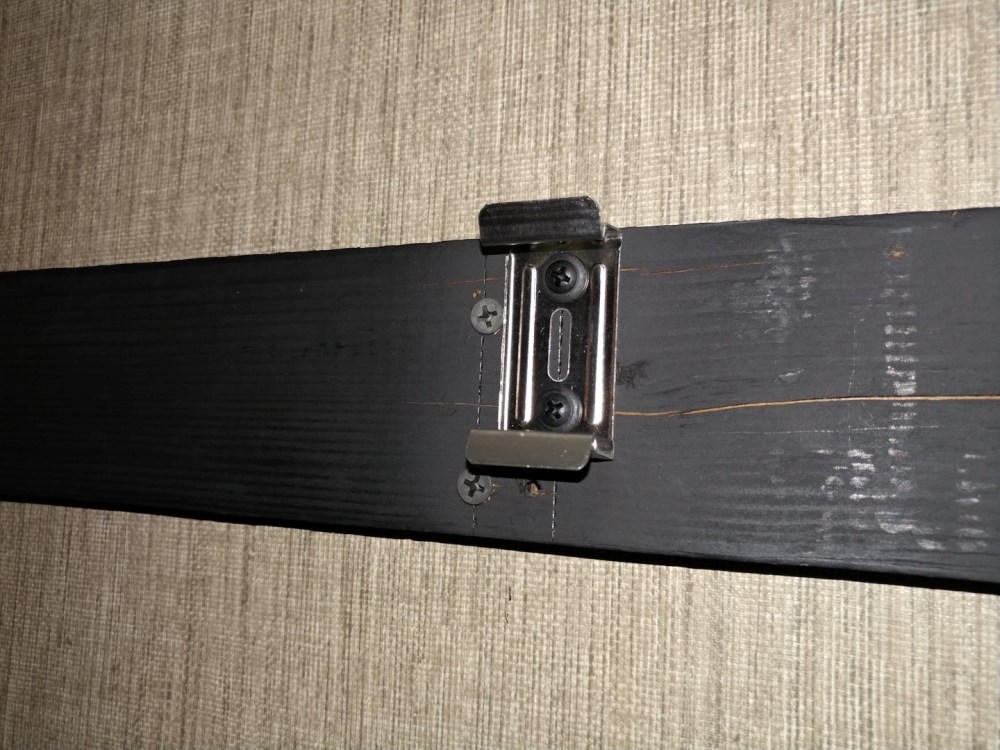
The light fixture easily snapped into the mounting brackets. I tucked the long cord up above and behind the light and plugged it in. I was going to hardwire it until we thought about potential future guests once we get the place organized.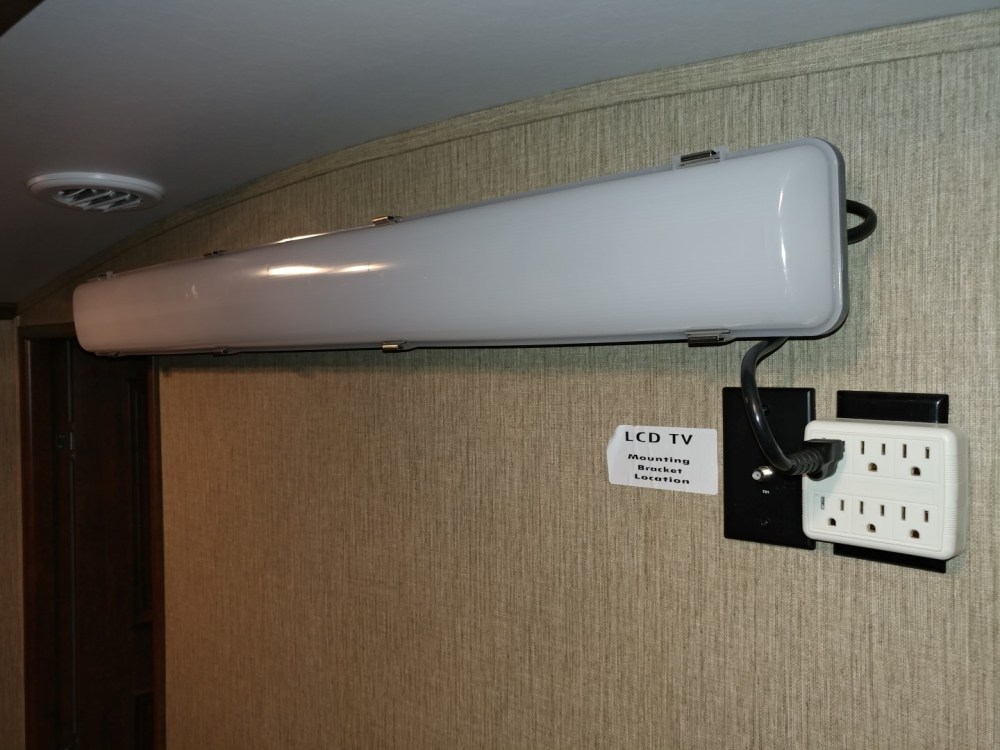
It works! I suppose if you’re using this as a bedroom instead of a garage, this light would not be very pleasing. But look at the Brightside (pun intended), guests won’t want to stay very long after a night of light torture! J/K
Now, you may have noticed that the light slightly hangs over a corner of the door. It’s not noticeable from inside the living area but it’s obvious in the garage. I knew this would happen, but I still wanted the light centered on the wall.
The real problem was that the wall studs disappear above where I mounted the light. My guess is that the ceiling truss is there, but I couldn’t find a header “beam” that you’d expect it to sit on. I have no idea what wires or other things are in there so I compromised and mounted it as high as possible. I just keep telling myself “it’s a garage.”
Along with that theme of “it’s a garage,” please don’t judge this embarrassing mess! We’re STILL moving in and trying to figure out how to store things in this RV, which our previous 293BHS RV had no problem doing in its outside compartment storage. And we keep adding more things (like an air conditioner)! Eventually, as projects get checked off the list I won’t have to keep bringing half my toolbox anymore either. Regardless, here’s how well the light works, showing all our skeletons! 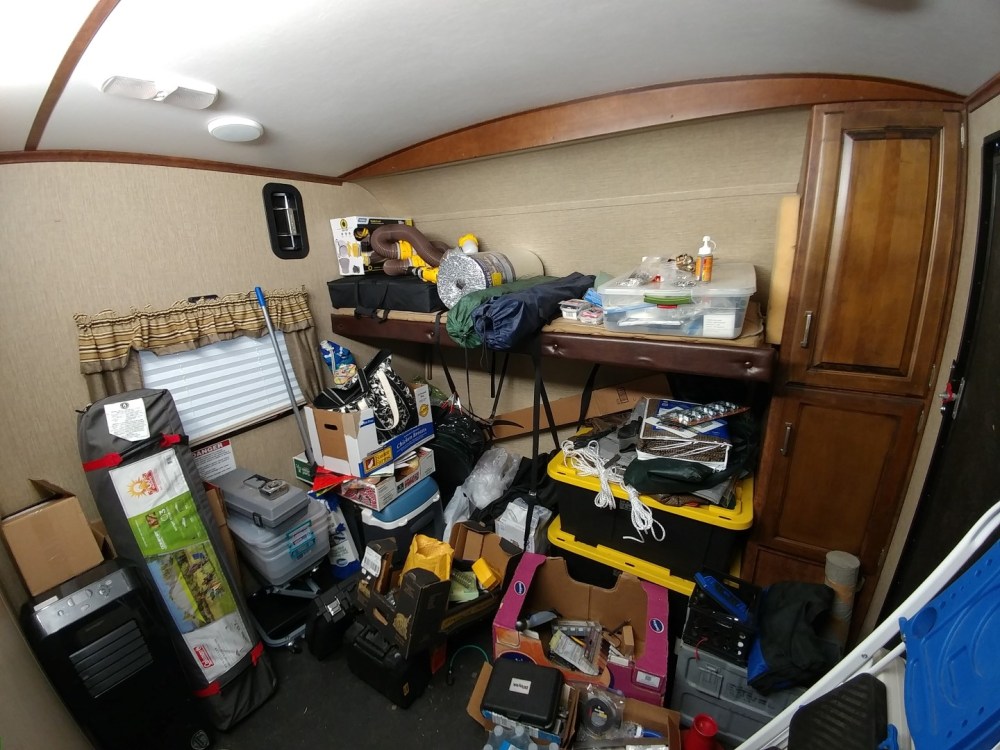
The end.
Check out our other upgrades! Have any questions about this project? Please chat below and I’ll try to respond in a reasonable time. Remember, we have full-time careers and this blog is just a hobby. ☺️
Best regards – RVTherapy

One comment